Borosilicate glass is among the most durable glass materials available to consumers and scientists alike, resistant to thermal shock, chemically inert, and built to last through decades of daily use. But it is not indestructible.
A dropped Pyrex dish, a chipped laboratory flask, a cracked glass storage container; these are common enough occurrences that the question of the repair of borosilicate glassware and repair versus replacement is one most people eventually face.
The frustrating reality is that most of the information available on this topic is either incomplete or actively misleading. Home-user guides say “use epoxy, and it will be good as new.”
Laboratory forums debate whether UV resin is food-safe. Neither group explains why certain repairs hold indefinitely, and others fail catastrophically the first time heat is applied.
This guide covers both home and kitchen users with damaged Pyrex and glass bakeware, and laboratory and industrial users with broken scientific equipment and explains not just what to do but why certain approaches work, and others inevitably fail.
The physics matters here, and understanding it takes the guesswork out of every repair decision.
Can Borosilicate Glass Be Repaired?
The short answer, it can be repaired, but it depends on the damage type.
Before anything else, here is a structured answer to the most common question. Identify your damage type in the left column and read across.
| Damage type | Repairable? | Best method | Safe for heat after repair? | Recommended action |
|---|---|---|---|---|
| Minor chip — non-food-contact area | Yes | UV resin or two-part epoxy | No | Repair for cosmetic/decorative use; retire from heated food use |
| Minor chip — food-contact area | Limited | UV food-safe resin only | No — not above 120°C | Repair for cold use only; replace if the item will be heated |
| Hairline surface crack | Sometimes | UV-cure resin (capillary fill) | No | Repair for cold or display use; replace for any heat application |
| Through-crack (full depth) | No | None that restores integrity | No | Replace immediately — unsafe for any use |
| Clean break (two intact pieces) | Yes — with limits | Two-part epoxy or UV resin | No | Repair for cold decorative use only; replace functional heated items |
| Shattering / multiple fragments | No | None | No | Replace — do not attempt repair |
| Laboratory joint, stopcock, or flange | Yes — professionally | Scientific glassblower only | Yes — after annealing | Send to a professional glassblowing service |
| Star crack in the lab vessel | Sometimes | Professional assessment required | Depends on repair | Contact a scientific glassblower for evaluation |
The single most important rule across all of the above: no adhesive-based DIY repair restores heat safety.
A repaired item can be used again, but only in a context that does not involve the oven, microwave, stovetop, or any significant thermal cycling. The reason for that rule is not arbitrary caution. It is physics.
Why Borosilicate Glass Is Harder to Repair Than Regular Glass
Borosilicate glass is specifically engineered to resist the conditions that would destroy most other glass: extreme temperatures, chemical exposure, and repeated thermal cycling.
Those same properties are precisely what make it so difficult to repair. The characteristics that give it exceptional performance in use are the ones that work against adhesive bonding and DIY restoration.
Non-porous surface — adhesives cannot penetrate, only bond at the surface
Most adhesives achieve their holding strength through a combination of mechanical interlocking, penetrating the microscopic pores and fibres of the surface they bond to, and chemical reaction with the substrate.
Wood glue works partly because it soaks into the wood grain. Epoxy on rough metal keys into the microscopic texture of the metal surface. Borosilicate glass has neither.
Its surface is completely non-porous and exceptionally smooth — so smooth that adhesives can only form a surface-level chemical bond rather than a penetrating structural one.
This makes the bond inherently shallower than what the same adhesive achieves on most other materials, and it means that any stress applied at the bond point, including the thermal stress discussed below, acts directly on a thin interface layer with no mechanical anchor.
The thermal expansion mismatch — why repairs fail under heat
Every solid material expands when heated, and each material has a characteristic rate of expansion called its coefficient of thermal expansion, measured in units of 10⁻⁶ per degree Kelvin.
Borosilicate glass has one of the lowest thermal expansion coefficients of any consumer material — approximately 3.3 × 10⁻⁶/K.
This is why borosilicate can be taken from a cold environment and placed in a hot oven without shattering the glass barely expands, so it does not develop the internal stress that shatters other glasses under rapid temperature change.
Most two-part epoxy adhesives have a coefficient of thermal expansion of approximately 50 to 60 × 10⁻⁶/K. When you repair a borosilicate item with epoxy and then heat it, the epoxy tries to expand at 15 to 18 times the rate of the glass surrounding it.
The result is a growing shear stress at the bond interface with every degree of temperature increase. Below a certain temperature threshold, the bond holds.
Above it — and that threshold is typically reached well within the temperature range of a domestic oven or a microwave — the adhesive either pulls away from the glass surface or the stress fractures the already-weakened glass at the repair point.
This is why repaired borosilicate passes a cold test perfectly and then fails suddenly when heated. It is not a matter of using a better epoxy or applying it more carefully.
The fundamental expansion rate mismatch between the adhesive and the glass makes thermal failure physics, not poor technique.
The annealing requirement — why DIY repair is structurally different from professional repair
When a professional scientific glassblower repairs borosilicate glass — fusing a broken joint, reattaching a fractured section, or filling a crack with matched borosilicate rod — the repair itself is done at the molecular level.
Glass-to-glass fusion at high temperature creates a continuous silicate network across the repair site, chemically indistinguishable from the original glass once cooled. But the process is not complete when the torch is extinguished.
After any glassblowing work, borosilicate must be placed in a controlled annealing oven — typically at around 560°C for standard borosilicate — and then cooled very slowly over several hours, reducing temperature at a precisely controlled rate.
This annealing process relieves the internal stress introduced by the concentrated heat of the glassblowing torch. Without it, the repaired glass has invisible internal stress gradients that make it prone to spontaneous fracture under normal thermal use.
No DIY adhesive method can replicate this process. A glassblower does not just hold broken pieces together more durably than epoxy — they fuse them back into a single continuous glass structure and then remove the internal stress that would otherwise cause failure.
That is why professional repair genuinely restores a glass item to usable condition, while adhesive DIY repair at best stabilises a structurally compromised piece for limited cold use.
DIY Repair Methods for Borosilicate Glass — What Each Can and Cannot Do
There are four types of adhesive or sealant that are regularly used for borosilicate glass repair.
Each has a specific set of conditions under which it performs acceptably and a clear set of conditions under which it fails. Set your expectations before you open a tube: no DIY method restores the heat-safe structural integrity of the original glass.
What these methods can do is make a damaged item serviceable again for cold or decorative use, which is genuinely useful in many situations.
Two-part epoxy — best for non-heated structural bonding
Two-part epoxy is the strongest of the DIY options for glass repair. It consists of a resin and a hardener mixed at the point of use, creating a chemical bond through a cross-linking reaction that reaches full strength after 12 to 24 hours of curing.
On a clean break — a glass container that has snapped into two intact pieces — well-prepared epoxy creates a bond that is strong enough for cold storage use.
The limitation is thermal. Standard two-part epoxy is rated to approximately 120–150°C at the upper end of consumer formulations, and most standard epoxies begin to soften and lose adhesive strength well before that temperature in sustained use.
For any item that will be used in an oven, microwave, or on a stovetop, epoxy is not an appropriate repair material. It is also not dishwasher safe — the combination of hot water, detergent, and mechanical pressure degrades the bond significantly over time.
For a repaired borosilicate item that will only be used for cold food storage or as a display piece, well-applied epoxy provides a durable and reasonably invisible repair. For food-contact surfaces that will be heated, it is not acceptable.
UV-cure resin — best for small, precise repairs with food-safe options
UV-cure resin works differently from epoxy. It is a low-viscosity liquid that flows into fine cracks and chips by capillary action, the same physical mechanism that draws liquid up a narrow tube, and then cures rapidly when exposed to ultraviolet light, typically within 5 to 10 minutes under a UV lamp and within 20 to 30 minutes in direct sunlight.
For hairline cracks or small chips where the damage is narrow enough for the resin to fill by capillary penetration, UV resin produces a cleaner and more cosmetically invisible repair than epoxy.
Food-safe formulations exist — Loctite Glass Glue is the most widely available and states food-safe compliance after curing, making this the better choice for surfaces that will contact cold food or drink.
The heat resistance ceiling for most UV glass resins is approximately 120°C, which is sufficient for a glass that will never be heated, but not for any oven or stovetop use.
Like epoxy, UV resin cannot compensate for the CTE mismatch under heat — it simply reaches its failure threshold at a predictable temperature rather than catastrophically in an oven.
Cyanoacrylate super glue — for cosmetic repairs only
Standard cyanoacrylate super glue bonds glass surfaces quickly and with reasonable clarity, but it is the least durable of the repair options for borosilicate.
The bond is brittle under mechanical stress, has very low heat resistance — typically 80–90°C before softening — and is not food safe in its standard formulations.
It is useful for a purely cosmetic repair on a decorative item that will never be handled or used for food, and for quickly reassembling broken pieces to assess whether a proper repair is worthwhile.
Do not use cyanoacrylate for any item that will see regular handling, food contact, or any temperature above a warm room. Some glass-specific cyanoacrylate formulations perform better than standard super glue, but they share the fundamental heat and brittleness limitations.
Silicone sealant — for sealing only, not structural repair
Silicone sealant is not a structural adhesive and should not be used to reassemble broken glass.
What it is suitable for is sealing a gap or joint where flexibility and heat resistance are needed, and structural strength is not, for example, the seal between a glass lid and a vessel where the glass itself is intact but the seal has failed, or to protect the edge of a chip from further moisture ingress.
Food-safe, high-temperature silicone is available and handles temperatures up to 200–300°C, depending on formulation, making it one of the few repair materials that can coexist with moderate heat applications.
It will not hold two glass surfaces together under stress, but for a non-load-bearing sealing application, it is the most temperature-tolerant option in the DIY category.
Step-by-Step: How to Repair Chipped or Cracked Borosilicate Glass at Home
Before beginning, read this: This process is appropriate only for cold-use items after repair — decorative glass, room-temperature storage containers, display pieces.
If the item will be used in an oven, microwave, or on a stovetop after repair, do not proceed. Retire it from heat use or replace it.
- Assess the damage and confirm it is suitable for repair. Refer to the decision table at the top of this article. Through-cracks, shattered glass, and any crack that affects a structural load-bearing area should not be repaired. Only minor chips, hairline surface cracks, and clean breaks between two intact pieces are appropriate for DIY adhesive repair.
- Clean the glass thoroughly. Wash the break surfaces with mild soap and warm water, then dry completely. Use a cotton swab dipped in isopropyl alcohol (90% or higher) to clean the specific surfaces that will bond. Any fingerprint oil, dust, or food residue on the bonding surfaces will significantly weaken the adhesive and may cause the repair to fail or appear cloudy.
- Choose your adhesive based on the repair type. For a clean break between two intact pieces, use two-part epoxy. For a hairline crack or small chip, use UV-cure resin. For a purely decorative cosmetic repair with no food contact, standard glass-specific super glue is acceptable.
- Apply the adhesive sparingly. For epoxy, mix only as much as you need and apply a thin, even layer to one bonding surface only — not both. For UV resin, apply a small amount to the crack and allow capillary action to draw it into the damage before adding more. Excess adhesive on the outside of the repair creates a visible ridge and weakens the bond by preventing the surfaces from seating correctly.
- Hold or clamp the repair until cured. For epoxy, hold the pieces firmly together for at least three minutes, then support the item so the joint is under no stress during the 12 to 24-hour full cure time. For UV resin, expose the repair to UV light (UV lamp or direct sunlight) for the manufacturer’s stated curing time before handling. Do not expose a UV-cured repair to direct food contact until 24 hours have passed, even if the surface feels cured.
- Test the repair before returning the item to use. Flex the repaired area gently. Fill a repaired container with cold water and leave it on a surface for 30 minutes to check for leaks. If the repair feels unstable, shows any movement, or the container leaks, do not use it. Do not put the repaired item in a dishwasher — the heat and mechanical stress will degrade all adhesive bonds regardless of formulation.
Repairing Kitchen Borosilicate Glassware — Pyrex, Bakeware, and Storage Containers
Most domestic borosilicate glassware is designed for use with heat baking dishes, casseroles, glass lids, and storage containers that go from refrigerator to microwave to table.
This creates a fundamental problem for adhesive repair: the temperatures involved in normal kitchen use exceed what any adhesive can tolerate, and the sudden temperature changes involved in going from a cold fridge to a hot oven are exactly the conditions under which the CTE mismatch causes adhesive failure.
The practical division for kitchen glassware is straightforward. Before deciding to repair any piece, ask: Will this item ever see heat again in the way it was originally used?
What is safe to repair and continue using — cold-use items only
- Glass food storage containers used only for cold food — a container you fill with leftovers, refrigerate, and eat cold directly from can be repaired with epoxy or UV resin and returned to that specific cold-only use
- Glass water bottles and carafes used at room temperature — a carafe used for cold water or room-temperature beverages is a reasonable repair candidate with food-safe UV resin
- Glass measuring jugs used only for cold liquids — if the chip is minor and away from the measurement markings, a UV resin repair on a cold-use measuring jug is acceptable
- Decorative glass items with no food contact — vases, display bowls, and glass ornaments can be repaired cosmetically with epoxy or super glue for appearance without any safety concern
- Glass teapots or carafes that will only hold cold drinks — if permanently retired from hot use, a clean-break repair with epoxy is appropriate
What should always be replaced — anything used with heat
- Any glass bakeware, casserole dish, or roasting pan — these regularly reach 200°C and above; no adhesive repair is safe at these temperatures
- Glass lids used on stovetop pots or heated containers — repeated steam and heat cycling will fail any adhesive repair; replace
- Pyrex measuring jugs are used to heat liquids in a microwave — the combination of microwave energy and the liquid content’s heat exceeds what adhesive repairs can withstand safely
- Any cracked item, regardless of intended use — a crack in borosilicate glass represents a stress concentration point; under any thermal cycling, even moderate heat, crack propagation can be sudden and without warning; do not use cracked borosilicate glass for any purpose involving heat
- Any item where the chip or crack is on a food-contact surface, and the item will hold acidic food, acid can degrade certain adhesives and potentially introduce adhesive chemistry into food over time
See our guide to the best borosilicate glass bakeware if you are replacing a damaged piece.
Professional Glassblowing Repair — When It Is the Right Answer
For laboratory, scientific, and industrial borosilicate glass equipment, professional glassblowing repair is not just an alternative to replacement — it is frequently the technically superior and significantly more cost-effective option.
A pharmaceutical company or research laboratory facing the loss of a custom-fabricated glass column or bioreactor vessel does not simply order a new one from a shelf.
Custom borosilicate equipment can take weeks to manufacture, costs thousands of dollars, and the downtime associated with replacement can have significant operational consequences.
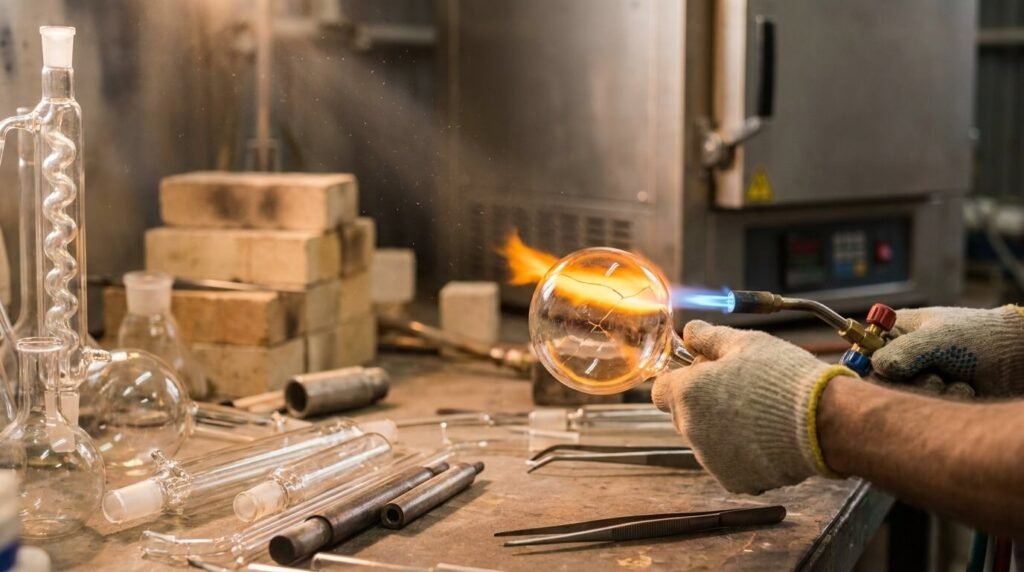
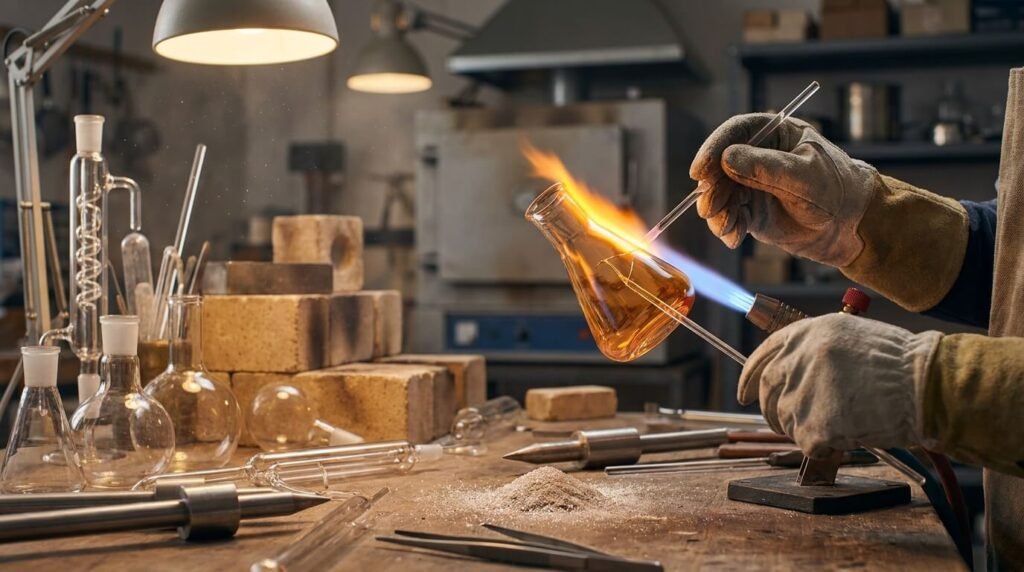
Professional scientific glassblowers do not use adhesives. They work with an oxyhydrogen or gas-oxygen torch to heat the borosilicate rod and the broken components to working temperature, fuse glass-to-glass at the molecular level, and then anneal the completed repair in a controlled kiln.
The result is a restored glass item with the same material properties as the original, including full thermal cycling capability.
What can a scientific glassblower repair?
- Broken ground glass joints (standard taper joints, spherical joints) — these can be replaced entirely with new matched fittings
- Damaged or cracked stopcocks and valve seats
- Chips and cracks in flanges — the flat sealing faces of process glass equipment
- Star cracks in flask bodies and vessel walls — assessed case by case; repairable if the crack has not propagated through the full wall thickness
- Broken glass tubing sections — removed and replaced with new borosilicate tubing of matched specifications
- Cracked or broken condenser jackets
- Damaged sight glass tubes and level indicators
- Custom joints, adapters, or fittings where the original specification needs to be matched exactly
Turnaround time and cost — what to expect
| Repair type | Typical turnaround | Cost vs replacement | Suitable for |
|---|---|---|---|
| Simple joint replacement | 3–7 days | 20–40% of replacement | Standard taper joints, spherical joints on common lab glass |
| Chip or crack in the flange | 5–10 days | 30–50% of replacement | Process glass flanges, reactor vessel lips |
| Star crack in the vessel body | 7–14 days | 40–60% of replacement | Flasks, columns — case-by-case assessment |
| Complex multi-point repair | 2–4 weeks | Up to 50% of replacement | Custom glass apparatus, multi-element assemblies |
| Custom re-fabrication of the section | 3–6 weeks | 50–80% of replacement | Where the original section is too damaged to repair |
Most reputable scientific glassblowing services follow a professional standard of not charging more than 50% of the replacement cost of the item without consulting the owner first.
If you are quoted more than half the cost of a new equivalent item, the consultation should include a clear explanation of why repair makes sense in that specific case.
For pharmaceutical and chemical industry clients, the documented cost savings from repair programmes compared to routine replacement can be substantial — industry case studies report savings of $50,000 to over $100,000 annually for mid-size operations that implement structured glass maintenance programmes.
How to find a qualified scientific glassblower
The American Scientific Glassblowers Society (ASGS) maintains a directory of member glassblowers across the United States, searchable by location and specialisation.
In the UK, the Society of Glass Technology can provide referrals. University chemistry and physics departments frequently have in-house glass shops that accept outside repair work, often at competitive rates.
When contacting a glassblower, send photographs of the damage before committing to shipping. Most reputable services will provide a rough estimate from photographs and can advise whether the repair is feasible before the item is packed and sent.
This avoids the cost and risk of shipping an item that turns out to be irreparable. If the damage involves hazardous chemical residue, clean the glass thoroughly before shipping — glassblowers require incoming items to be clean and decontaminated before work begins.
See our laboratory glassware buying guide for sourcing new glass if repair is not viable.
Is It Safe to Use Cracked or Repaired Borosilicate Glass?
On this point, there is no complexity: cracked borosilicate glass is not safe for any use that involves heat.
This applies whether the crack is hairline-thin, whether the item has been repaired, and whether the piece appears visually intact from the outside.
A crack in glass, regardless of how small, is a stress concentration point. Under the thermal cycling of normal kitchen or laboratory use — heating, cooling, rapid temperature changes — the stress at a crack tip increases with every cycle.
Borosilicate glass does not give a warning before it fails. There is no creaking, no visible progression of the crack, no preliminary indication that failure is imminent.
When the stress at a crack tip exceeds the tensile strength of the glass at that point, the item shatters. For a Pyrex baking dish in a 200°C oven or a laboratory flask being heated on a hot plate, that failure is sudden, complete, and potentially dangerous.
A DIY adhesive repair does not remove the crack — it bridges it. The crack itself remains in the glass beneath the adhesive.
Under heat, both the crack tip stress and the CTE-driven adhesive shear stress act together on the same weakened point. The result is a higher probability of failure under heat than the unrepaired cracked glass would have presented.
The safe use cases for adhesive-repaired borosilicate glass are limited to cold, non-pressurised, non-food-heated applications: a repaired storage container used for cold leftovers, a repaired glass vase, a display piece.
Anything beyond that crosses into risk that is not justified by the cost savings of avoiding replacement. See our safe kitchen guide for more on identifying and managing unsafe kitchen equipment.
Repair vs Replace — A Cost Comparison by Item Type
| Item type | Typical replacement cost | Professional repair cost | DIY adhesive repair | Recommended action |
|---|---|---|---|---|
| Pyrex baking dish (2–3 qt) | $15–$30 | Not applicable | $2–$5 materials | Replace — heat use makes the repair unsafe |
| Borosilicate glass storage container | $10–$25 | Not applicable | $2–$5 materials | DIY repair if cold-use only; replace if heated |
| Glass laboratory flask (500ml) | $30–$80 | $10–$40 (joint repair) | Not recommended for lab use | Professional repair of joint damage; replace if the vessel is cracked |
| Custom laboratory column or reactor | $500–$5,000+ | $150–$2,500 | Not appropriate | Professional repair — significant cost saving |
| Pharmaceutical process glass assembly | $5,000–$50,000+ | $1,000–$25,000 | Not appropriate | Professional repair programme — documented 40–60% cost saving |
The decision framework is straightforward. For inexpensive consumer kitchen glass, the cost difference between DIY repair and replacement is small enough that the right answer depends almost entirely on whether heat will be involved.
If heat is involved, replace. If the item will only be used cold, DIY repair with an appropriate adhesive is a reasonable choice.
For laboratory and industrial equipment, professional repair consistently delivers significant cost savings over replacement, provided the structural damage is within the range that glassblowing can restore to full operating specification.
Frequently Asked Questions About Borosilicate Glass Repair
Can you repair borosilicate glass with epoxy?
Yes, with important limitations. Two-part epoxy creates a strong bond on clean, dry borosilicate surfaces and is suitable for cold-use applications — a repaired storage container used for cold food, a decorative item, or a non-functional display piece.
Epoxy is not suitable for any item that will be exposed to oven, microwave, or stovetop temperatures.
The thermal expansion rate of epoxy (50–60 × 10⁻⁶/K) is 15 to 18 times higher than borosilicate glass (3.3 × 10⁻⁶/K), which means heat drives shear stress at the bond that causes the repair to fail.
Is a repaired borosilicate glass item safe to put in the oven?
No. No adhesive-based DIY repair makes a borosilicate item safe for oven use.
The temperature mismatch between adhesive thermal expansion and glass thermal expansion causes bond failure well within normal oven temperatures, and any underlying crack or chip in the glass remains a stress concentration point regardless of how the surface is covered.
If the item was designed for oven use, replace it rather than attempt a repair.
What is the strongest glue for borosilicate glass?
For cold-use, non-structural applications, well-prepared two-part epoxy provides the strongest bond on borosilicate glass.
For hairline cracks and small chips where capillary penetration is possible, UV-cure resin provides a more complete fill.
No consumer adhesive approaches the strength of a professional glassblowing repair, which fuses glass-to-glass at the molecular level rather than bonding at the surface.
For laboratory equipment, professional repair is the only method that restores full structural and thermal performance.
Can a cracked Pyrex dish be safely used?
Not for any heated use. A crack in borosilicate glass is a stress concentration point — under thermal cycling, stress at the crack tip increases with every heating and cooling cycle until fracture occurs.
Pyrex dishes regularly reach temperatures above 200°C in normal oven use. A cracked Pyrex dish used in the oven is likely to fail suddenly without warning.
Retire any cracked baking dish from heated use and replace it. If the dish is purely decorative or used only for cold food presentation, the crack does not present a safety risk in that specific context.
How much does professional lab glass repair cost?
It depends on the type and extent of the damage. Simple joint replacements on standard laboratory glassware typically cost 20 to 40% of the price of a new equivalent item.
More complex repairs to vessel bodies or flanges run 40 to 60% of the replacement cost.
Reputable scientific glassblowing services follow the professional standard of not charging more than 50% of the replacement cost without consultation.
For custom and pharmaceutical process glass where replacement costs run into thousands of dollars, professional repair frequently offers savings of $50,000 or more annually compared to routine replacement.
What damage types in borosilicate glass cannot be repaired at all?
Shattering, where the item has broken into three or more fragments, is generally not repairable to any functional standard.
Through-cracks (cracks that penetrate the full depth of the glass wall) cannot be made thermally safe by any method available outside a professional glass shop, and even professional repair should be assessed on a case-by-case basis.
Any damage to borosilicate glass that has resulted in material loss — where fragments are missing — cannot be structurally restored by DIY methods and may or may not be suitable for professional repair depending on the location and extent of the loss.
Is UV resin food-safe for glass repair?
Some formulations are. UV resin that specifically states food-safe compliance, such as Loctite Glass Glue, which states food-safe properties after full curing, is appropriate for glass surfaces that will contact cold food or drink.
No UV resin is safe for food-contact surfaces that will be heated above approximately 120°C, because heat both degrades the adhesive and can cause it to release its component chemistry.
When in doubt, keep any repaired surface away from direct food contact and use the repaired item for cold storage or display only.
How long does a professional glassblowing repair take?
Simple repairs to a broken joint on a standard flask, a chipped flange in a non-complex configuration, typically take 3 to 7 days once the item is received, cleaned, and assessed.
Moderate complexity repairs involving vessel body cracks or multi-element assemblies run 1 to 2 weeks. Intricate custom repairs or those requiring fabrication of matched replacement sections can take 3 to 6 weeks.
Most scientific glassblowing services will provide a time estimate alongside the cost estimate after initial assessment.
If you need a rapid turnaround, confirm availability before shipping. Specialist services often have work queues that affect scheduling for non-emergency repairs.
See our guide on borosilicate vs soda-lime glass, and best glass food storage containers.